 Last year (although part of me still wants to say this year), I started finally making craft projects using my lovely sewing machine, I started small with bunting for my mum’s birthday and for a friend although I only have a picture of my first attempt for my mum. I made a template that I was happy with and set about making something simple considering how nervous I was.
My next project was a quilt which is something I have always wanted to learn how to make. So in early October I booked on a course which was 3 half days over 3 months, and this become my Christmas project for my brother and his wife this year. Although it is described as a baby quilt, I think I would say it is just a quilt, all be it a small one, although I suspect it is going to used by a baby in the near future. I really enjoyed the course and the homework that went on between each class, plus the teacher was really very good too with continued support by email between classes.
Before the course started I had to choose what material to use, which seems simple enough but turned into a bit of an issue but in the end I got there with some advice along the way.
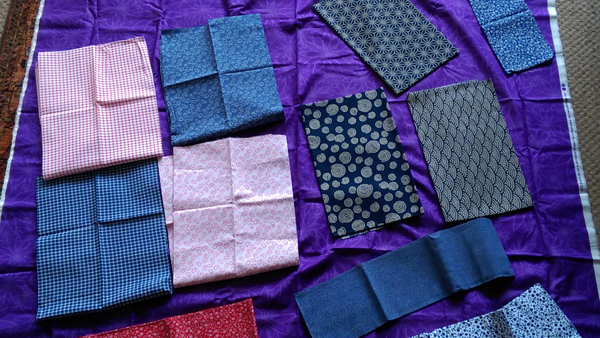
Different Material
I went along to the first session and we cut up our material and started making the squares, and then our homework was to sew the squares together to make rows, and then the block that would be the front of the quilt, I was surprised at just how much ironing was involved, what with seams needing to go this way and that.

Cuts and Squares
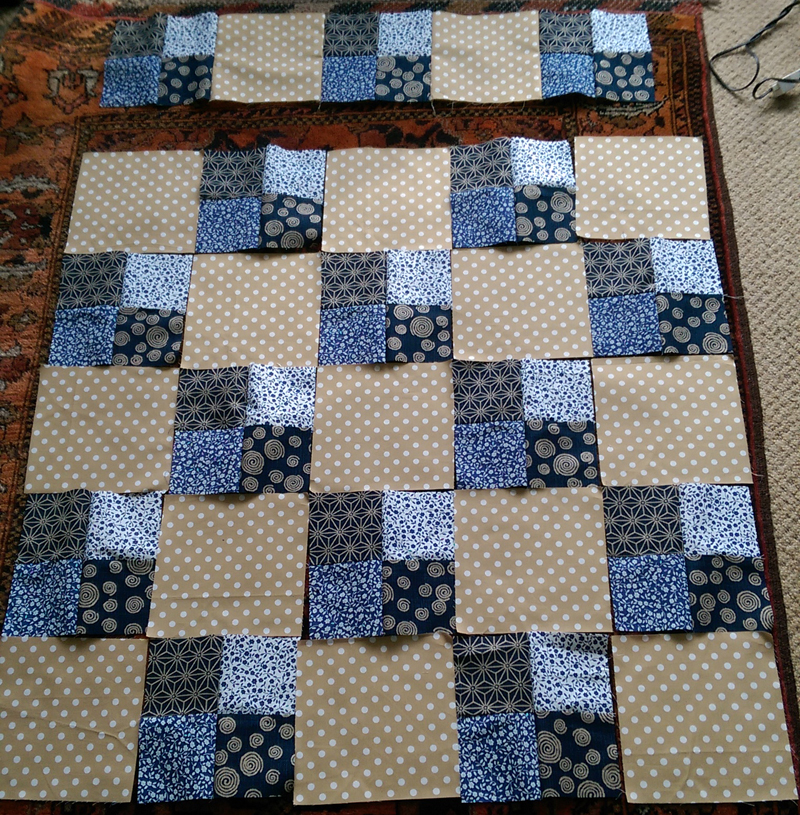
Rows
In the second session we added the border, then moved onto adding the wadding and back section, I like the special curved safety pins that we used to keep all three layers together, at this stage apparently you can put it all to one side for a later date. It was really good fun seeing it all come together. For home work we did the quilting (which is the sewing through layers), so in my case I used my machine to sew diagonally across the quilt in each direction.

Wadding (quilt now in 3 layers)
The last session we chopped off the excess, added the binding and learnt about labelling our work. Apparently because quilting is normally a craft that was used by woman to make things that were useful everyday, it is not always possible to know who made quilts and who for, hence it is generally a good idea these days to say ‘I made this’ somewhere on your quilt. I guess it enables people to guess at a social history of these cool items.

My hand made Label. (HF year and initials of who I made it for), plus on the back I put washing instructions.
The binding was my finals homework, as it needs to be done by hand in order to have the stitches hidden, I really liked making this quilt.

Close up of a corner of the quilt.

The Final Quilt.